
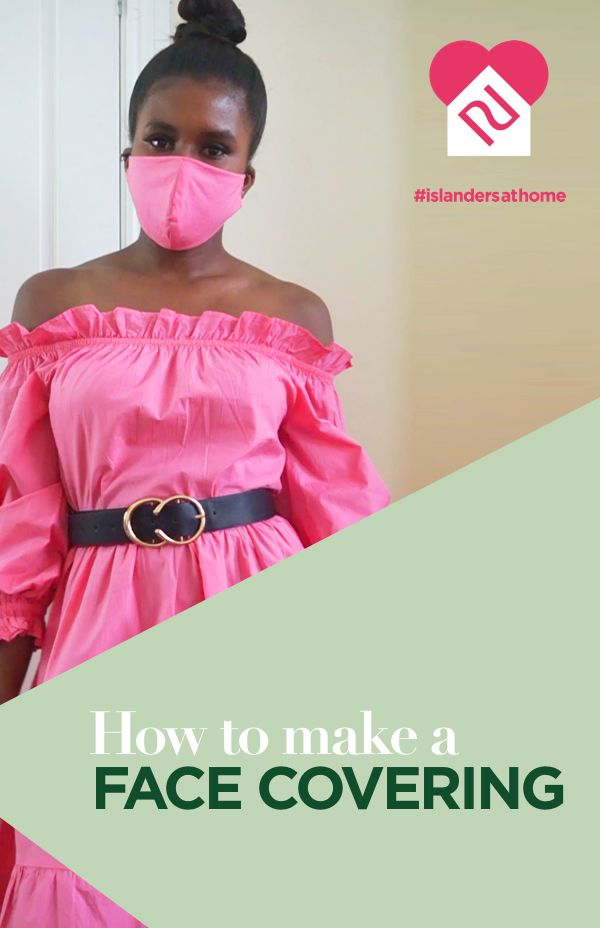
It was only a matter of time before the lockdown essentialface mask turned into a must have fashion accessory. If you’re wearing one – and we really advise you do – then why not make it cute?! Better yet why not make the co-ord of dreams and match your mask to your midi dresses? Cosy clothes were cool for a while, but it’s been over two months now and we want to feel extra (whilst staying safe!) Using our handy how-to, make your very own matching mask and midi combo for an added layer of protection called confidence.
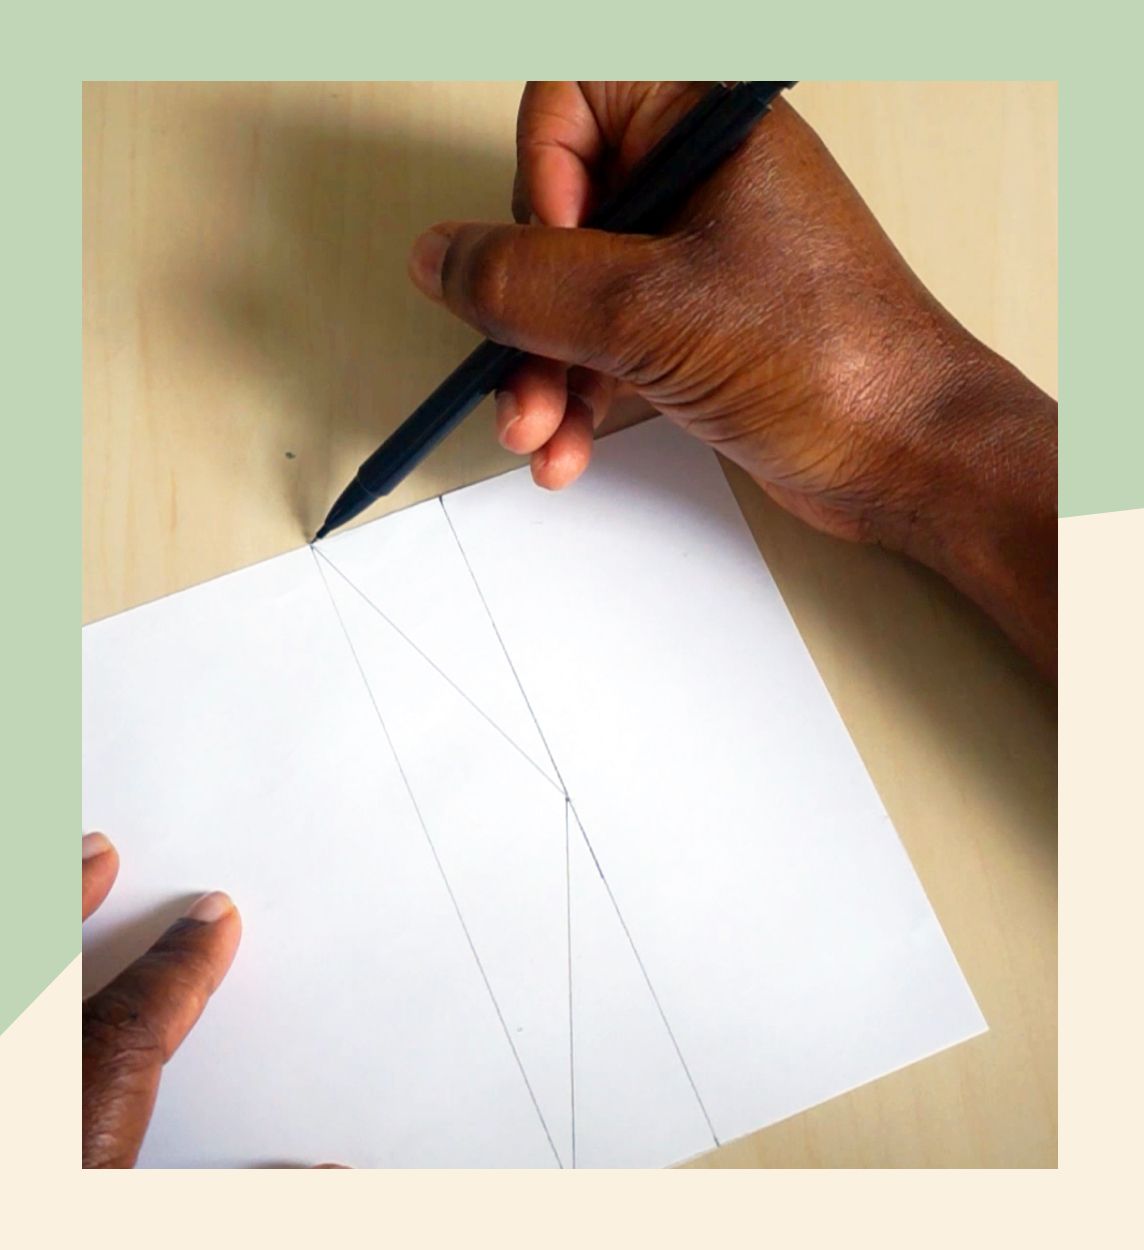
1. Start with a piece of paper 15cm wide and 21cm long. 15cm = the length from the middle of your nose to over your chin + 2cm. From the length measure 15cm and draw a straight line down. From inside that line, measure 3 cm and draw another straight line in parallel to the first one. Mark the middle of the outside line and connect this to the top and bottom of the inside line.
Draw a curved line from top to bottom making sure that the top curve is smaller than the bottom. From the top left of the paper mark 5cm down and draw a line to connect to the top of the inside line. Repeat on the other side except this time measure 3cm upwards. So, from the bottom left mark 3cm up and draw a line to connect to the bottom of the inside line. Now, cut out your pattern!
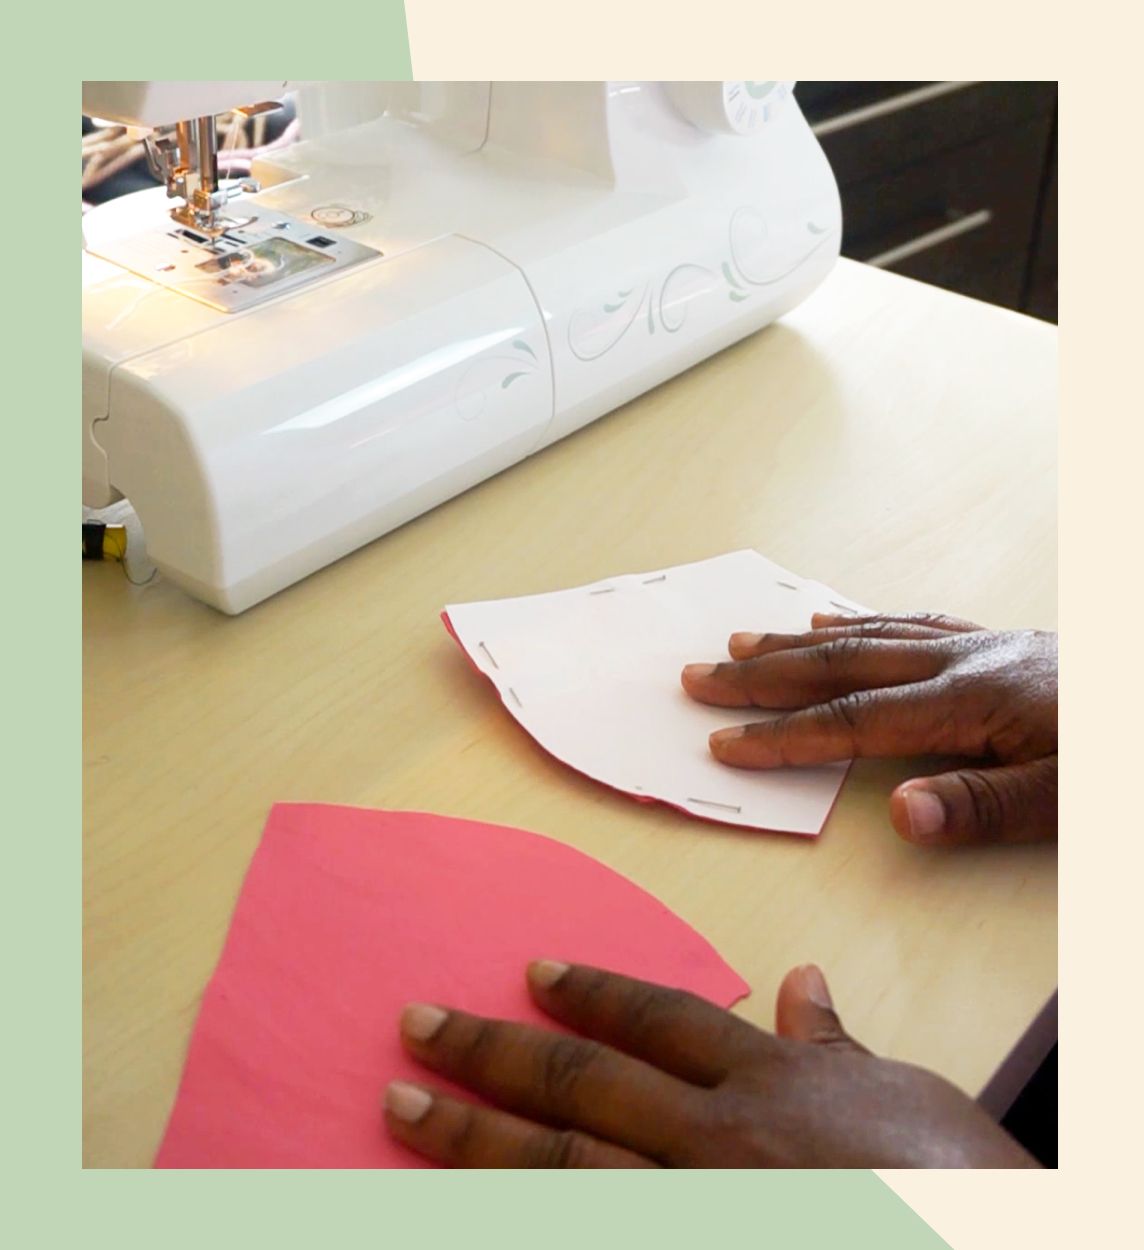
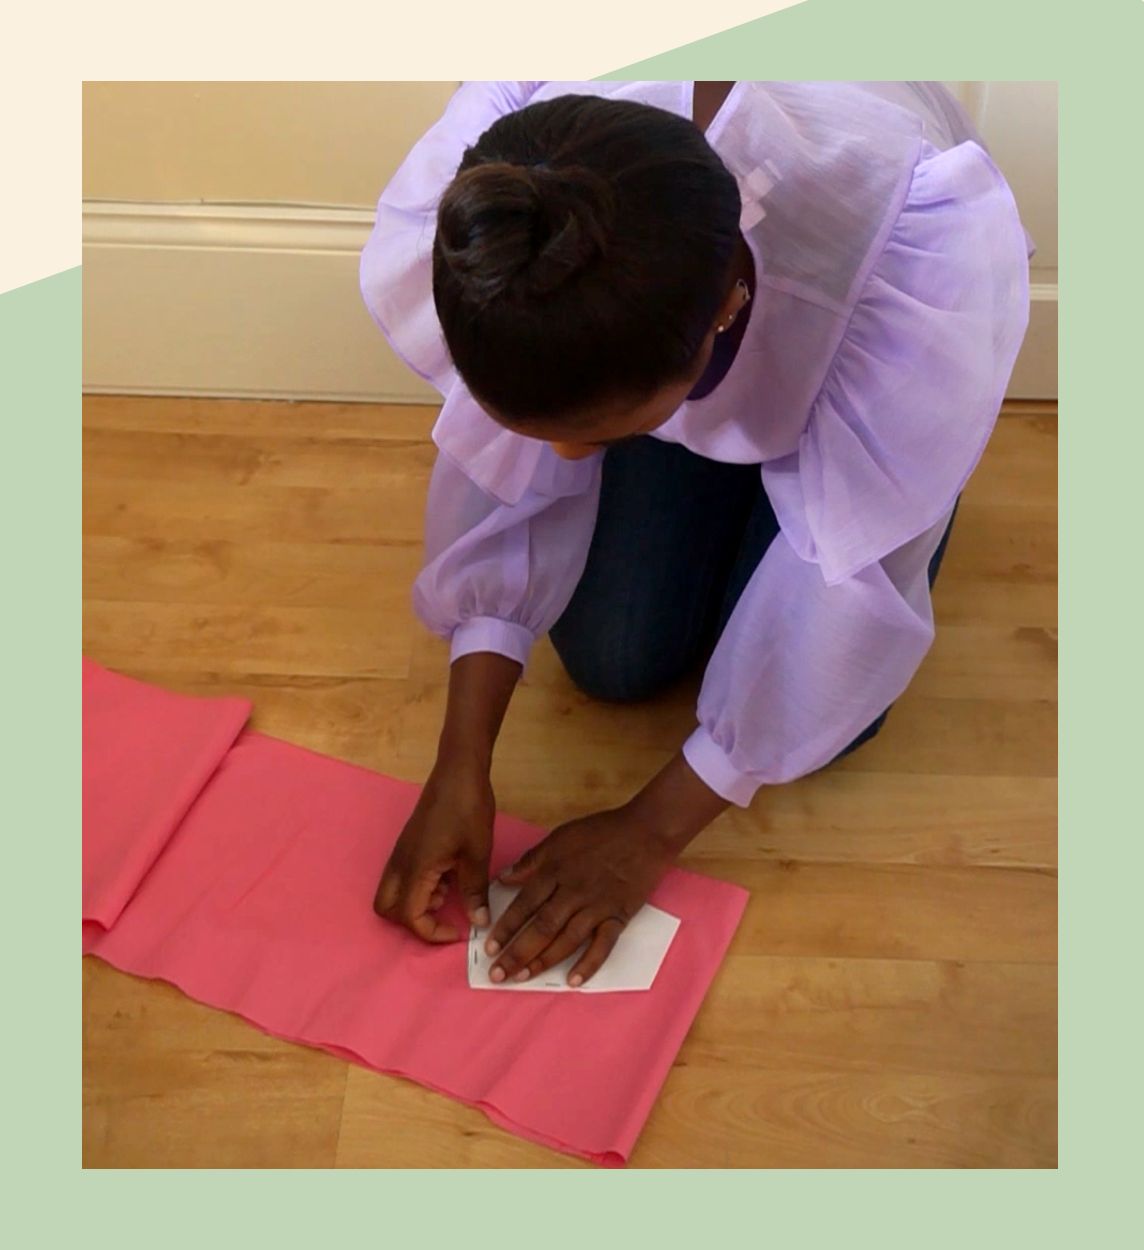
Grab your midi dress and measure from the bottom up to mark how short you want it to be. Mark this length along the width of the dress and cut along this line. Pin your pattern in place on the cut out dress fabric and cut it out. You need 4 x pattern pieces so make sure you cut so you have enough material. Then using a sewing machine (or by hand), sew the curved edge on two pieces together.
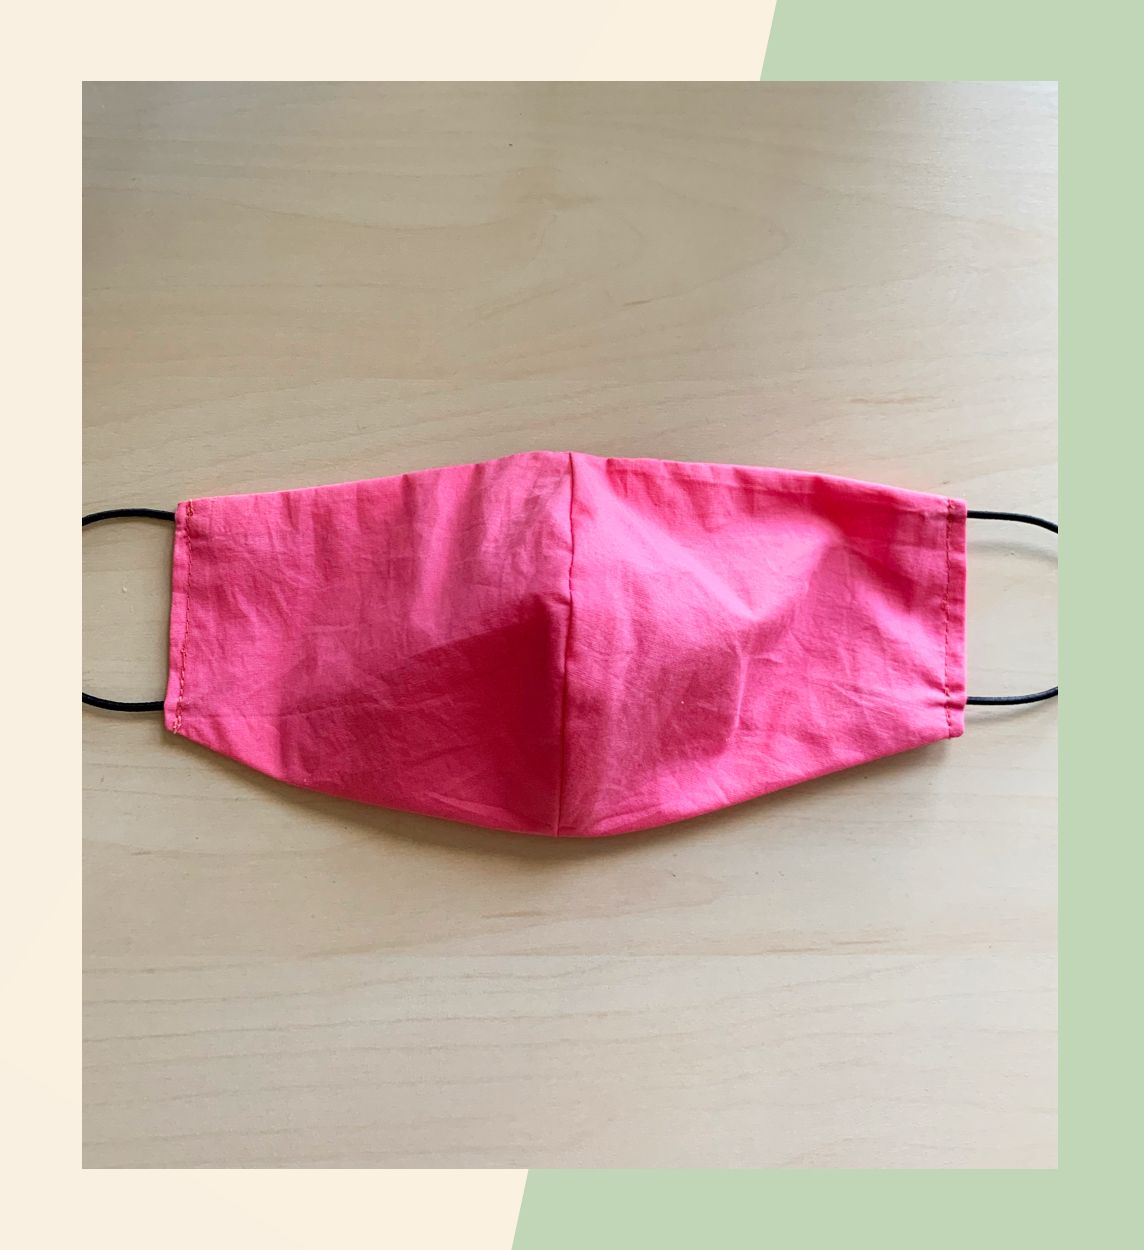
Lay one piece on top of the other with the right side of the fabric facing each other. Right = the fabric you want visible at the end. Pin and sew along the top and bottom edge making sure not to sew up the sides just yet! Turn it inside out. For the ear loops, cut a hairband in half and insert it into the mask edges. Finally, sew across the edge to keep the hairband in place and you’re done. Ready to slay!
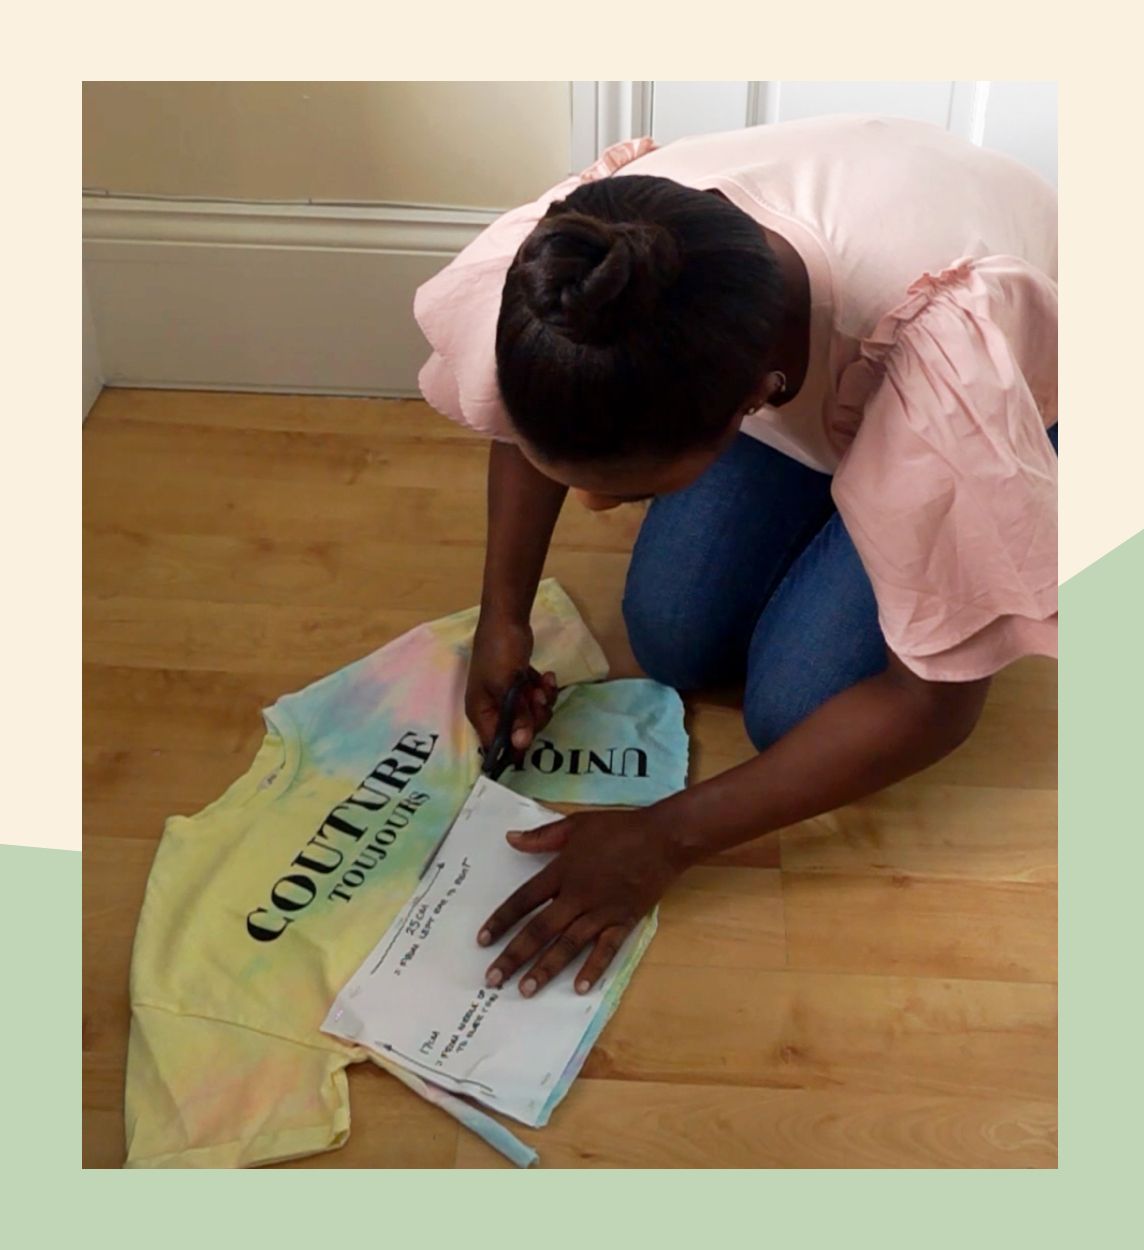
Cut a piece of paper with these measurements: 25cm width (from left ear to right) and 17cm length (from middle of nose to over chin plus 6cm). Grab a t-shirt they never wear and lay your pattern onto it, pinning it in place. Make sure to place the pattern on an area you like! Cut the pattern out twice! Pin the longest sides together and sew along both sides. Make sure the right side of the fabric is facing each other and then turn inside out. 3. Cut the pattern out twice! 4. Pin the longest sides together and sew along both sides. Make sure the right side of the fabric is facing each other (the side you want visible at the end). Turn inside out.

Mark 3cm from the width and fold from the edge to the 3cm mark and pin in place. Make sure there is enough space for the elastic to fit. Do the same on the opposite side. Sew the fold on both sides in place. For the ear loops, cut a hairband in half and place a pin through one end. Push the pin through the fold to bring the elastic through to the other side. Repeat on the opposite side. Using a needle and thread, sew the two ends of the elastic together and fold the seam inside the fabric to hide it. Repeat on the opposite side and voila!
